

Step 1 - Install REMI and EPEL Repositories and Packages
rpm -ivh http://dl.fedoraproject.org/pub/epel/6/x86_64/epel-release-6-8.noarch.rpm
rpm -ivh http://rpms.famillecollet.com/enterprise/remi-release-6.rpm
yum -y install php php-mcrypt php-pdo php-mysql pdns pdns-backend-mysql mysql-server httpd
Step 2 - Create a Database and Username
service mysqld start
service httpd start
mysqladmin create powerdns
Make sure to select your own password below:
mysql -Bse "create user 'powerdns'@'localhost' identified by 'password'"
mysql -Bse "grant all privileges on powerdns.* to 'powerdns'@'localhost'"
Step 3 - Create PowerDNS databases and tables:
Start mysql console with "mysql"mysql> use powerdns;
CREATE TABLE domains (
id INT auto_increment,
name VARCHAR(255) NOT NULL,
master VARCHAR(128) DEFAULT NULL,
last_check INT DEFAULT NULL,
type VARCHAR(6) NOT NULL,
notified_serial INT DEFAULT NULL,
account VARCHAR(40) DEFAULT NULL,
primary key (id)
);

CREATE UNIQUE INDEX name_index ON domains(name);

CREATE TABLE records (
id INT auto_increment,
domain_id INT DEFAULT NULL,
name VARCHAR(255) DEFAULT NULL,
type VARCHAR(6) DEFAULT NULL,
content VARCHAR(255) DEFAULT NULL,
ttl INT DEFAULT NULL,
prio INT DEFAULT NULL,
change_date INT DEFAULT NULL,
primary key(id)
);

CREATE INDEX rec_name_index ON records(name);
CREATE INDEX nametype_index ON records(name,type);
CREATE INDEX domain_id ON records(domain_id);

CREATE TABLE supermasters (
ip VARCHAR(25) NOT NULL,
nameserver VARCHAR(255) NOT NULL,
account VARCHAR(40) DEFAULT NULL
);
Exit mysql console by typing "exit": mysql> exit
Step 4 - Install PowerAdmin
Login as root and run:cd /root wget https://github.com/downloads/poweradmin/poweradmin/poweradmin-2.1.6.tgz tar xvfz poweradmin-2.1.6.tgz cd poweradmin-2.1.6/inc mv config-me.inc.php config.inc.php
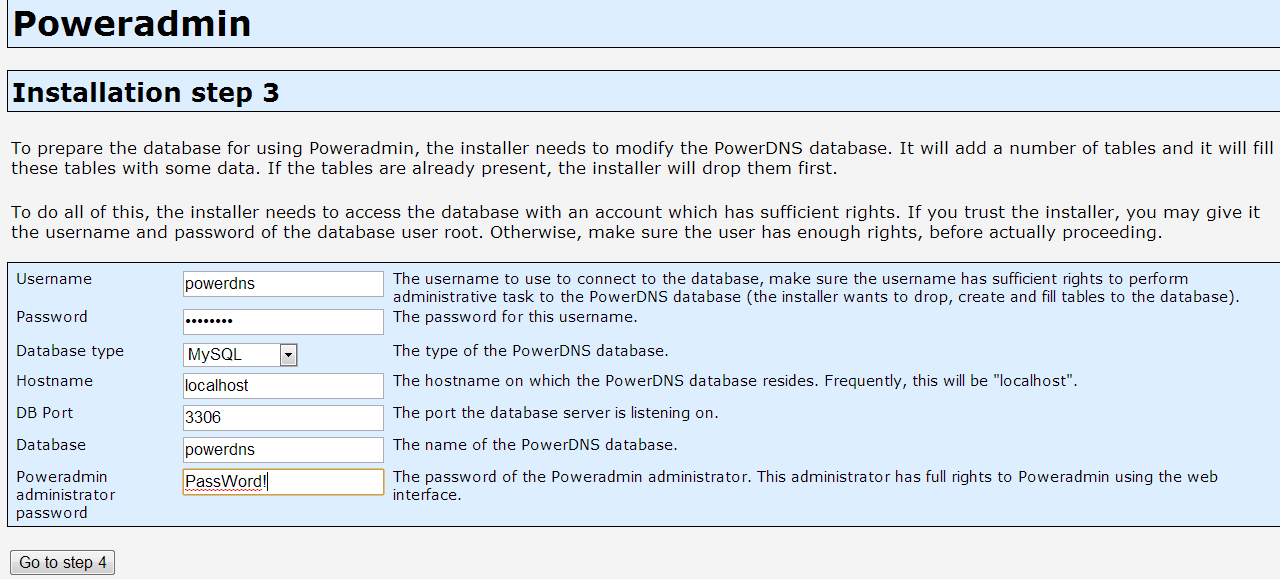
Edit config.inc.php and make sure to change password you've specified in Step 2:
nano config.inc.php
Modify db_pass and session_key to your own values:
$db_host                = 'localhost';
$db_port                = '3306';
$db_user                = 'powerdns';
$db_pass                = 'password';
$db_name                = 'powerdns';
$db_type                = 'mysql';
$session_key            = 'session_key';
Move PowerAdmin folder to Apache's DocumentRoot. We can use this droplet's IP address to manage our DNS settings
mv /root/poweradmin-2.1.6/* /var/www/html/
service httpd restart
Edit /etc/pdns/pdns.conf and add the following lines, make sure to modify gmysql-password to MySQL password you've selected in Step 2:
launch=gmysql
gmysql-host=localhost
gmysql-user=powerdns
gmysql-password=password
gmysql-dbname=powerdns
Restart Power DNS daemon:
service pdns restart
Step 5 - Create PowerAdmin Account
Proceed to installing PowerAdmin from webserver. Navigate over to your droplet's IP /install folder (in our case http://198.211.110.153/install/ ).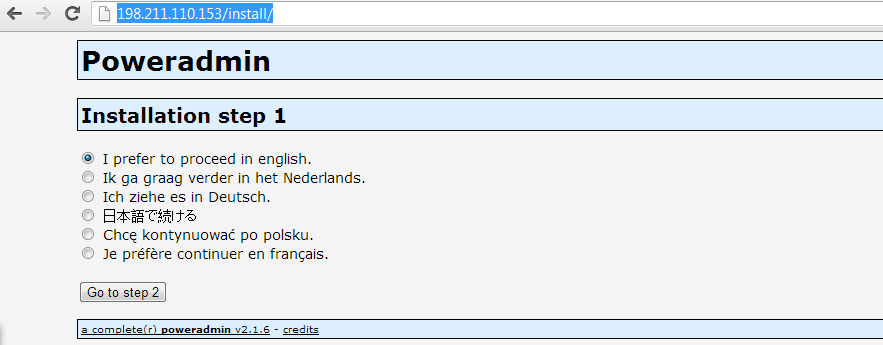
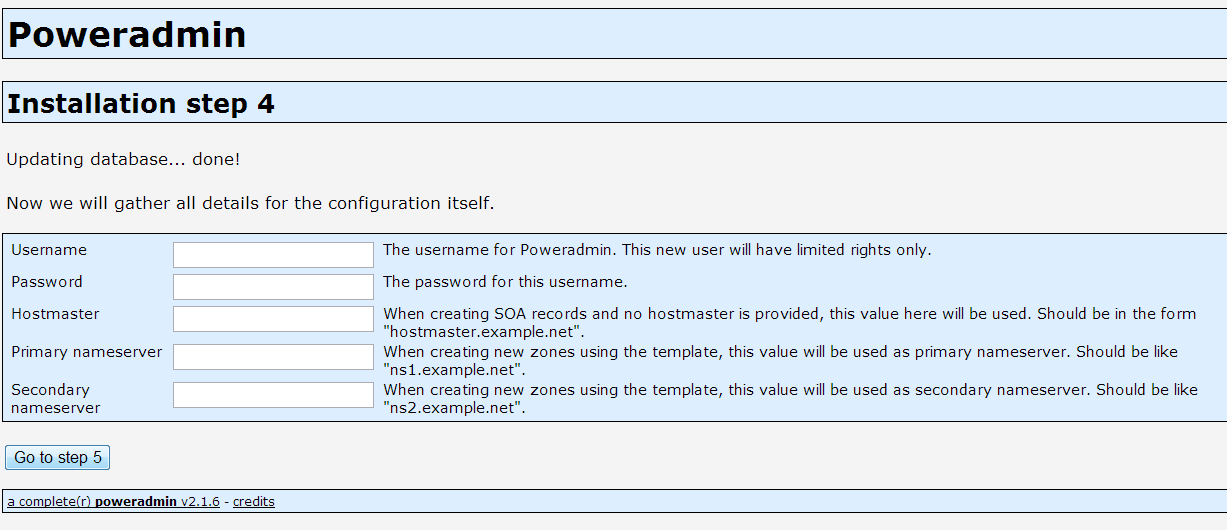
Create a Poweradmin admin account:
Next step is optional:
Finish the installation process, and after you get to Step 7, remove /var/www/html/install folder:
rm -rf /var/www/html/installNow you can navigate to your droplet's IP ( http://198.211.110.153/ in our case), and login as admin with password you've specified in Step 5.
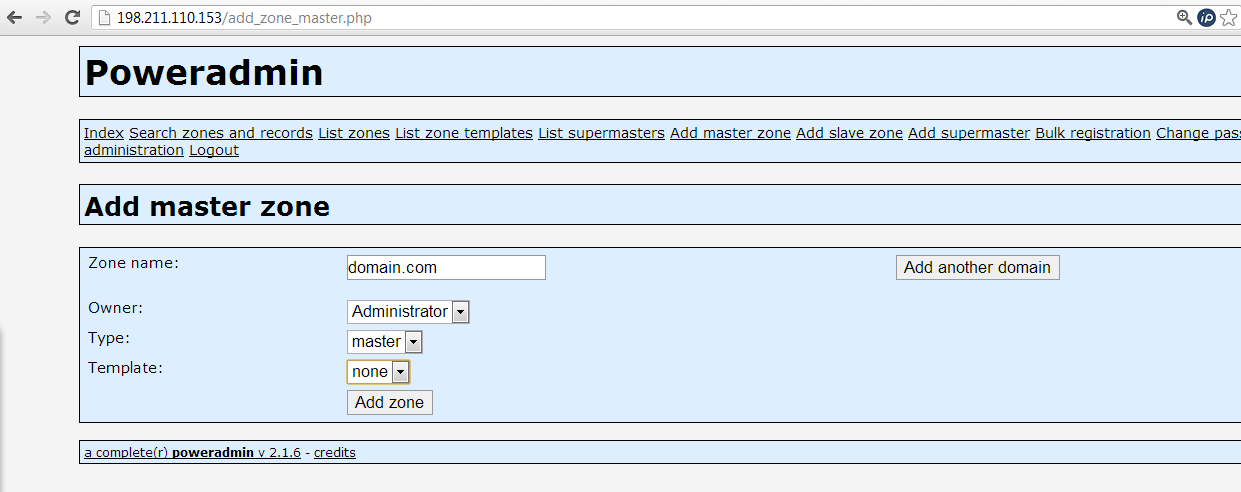
Now you can create your own DNS zone records:
You can verify that your new PowerDNS server is working by running dig against it:
dig @198.211.110.153 domain.com
;; ANSWER SECTION:
domain.com. 86400 IN A 127.0.0.1
And you are all done!
0 comments:
Post a Comment