There are a lot of questions, "why Cacti that has been installed in my Windows, not working ?", why no graph display?. The reason is you do not have the SNMP agent in each device that you want to monitor. This is the explanation, it's not details but I hope it makes you understand.
Simple Network Management Protocol (SNMP) is an "Internet-standard protocol for managing devices on IP networks". Devices that typically support SNMP include routers, switches, servers, workstations, printers, modem racks, and more. It is used mostly in network management systems to monitor network-attached devices for conditions that warrant administrative attention. (Wikipedia)
An SNMP-managed network consists of three key components:
• SNMP Agent, be in every device to be monitored, computer interfaces, switches, proxy, modem, and so on. Should be checked on every device. Checked whether snmp agent is installed or not ?
• SNMP manager. Receive and organize all the information from the agent. In Cacti for Windows, SNMP Manager is automatically installed. By default, you can see it in C:\net-snmp.
• Network Management System (NMS). Information from the SNMP manager, made in other forms, such as information graphics, alarms, email, sms, and so on. There are free and paid / Licence. For example, the free software are Cacti, MRTG, Nagios, and many others. And there are also paid, one of which is Solarwinds Oreon.
So if you've installed the NMS, such as Cacti, and you do not get a graphic display. Do not blame Cacti or person who recommended. :). Make sure the device you want to monitor, SNMP agent is enabled or already installed.
Install SNMP agent in Windows XP.
• Insert CD Windows XP.
• Click Start, click Control Panel, click Add or Remove Programs, and then click Add/Remove Windows Components, a list of components that need to be configured is displayed. To start the Windows Components Wizard, click Components.
• In Components, click Management and Monitoring Tools (but do not select or clear its check box), and then click Details.
• Select the Simple Network Management Protocol check box, and click OK.
• Click Next.
• You must be logged on as an administrator or a member of the Administrators group in order to complete this procedure.
Install SNMP agent in Windows 7.
To install SNMP on Windows 7, open Control Panel and then click on Programs and Features. Then, click on "Turn Windows features on or off" link in the left pane. If UAC prompted, then click on Yes. Then, in the Windows Features window, scroll down and select "Simple Network Management Protocol (SNMP)" check box and click on OK. Then, wait for some time to install SNMP.
Install SNMP agent in Linux.
In Centos or Fedora, follow command below.
yum install snmp snmpd
In Ubuntu, to install SNMP agent, follow command below.
apt-get install snmp snmpd
Then edit /etc/snmp/snmpd.conf
agentAddress udp:127.0.0.1:161,
edit to be
agentAddress udp:161
and make sure
rocommunity public
and then edit /etc/default/snmpd,
SNMPDOPTS='-Lsd -Lf /dev/null -u snmp -I -smux -p /var/run/snmpd.pid 127.0.0.1
Edit to be
SNMPDOPTS='-Lsd -Lf /dev/null -u snmp -I -smux -p /var/run/snmpd.pid
Enable SNMP agent in mikrotik
From winbox, click IP – SNMP. In the new box dialog, check enabled, you may enter information contact info and location. Or you can leave it blank. Click communities, then in another dialog box, you can set ip address which can access, and setting other security.
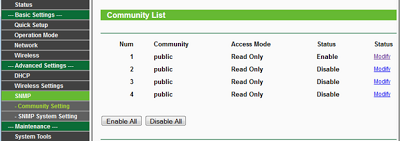
Enable SNMP agent Wireless Router Tplink
In Advanced Settings section, click SNMP – Community List, Then click modify to enable just one SNMP agent. Or if you want to enable all SNMP agent, click Enable All.
Security SNMP agent.
The goal is, that the SNMP agent is already installed, it will only send the data / information to theIP address / server we want, whereas for the other IP address will be blocked / rejected. There are 2 ways to make the security. ( that's my opinion, correct me if I wrong).
- First, setting snmp configuration. After installing SNMP, start – run. Type Services.msc in the Search box and hit Enter. Scroll down in the right pane and right click on SNMP Services and select Properties. Then, click on Security tab. The community name default is public. Change it, make it more secure.
- The second way is configure firewall, open port SNMP, and just allow IP address that we want. Click Start – Control Panel – Network and Internet Connection – Windows Firewall. The Windows Firewall box, will appear. Click Exceptions tabs, then Add Port. In the new open dialog, enter name : SNMP and port number 161, select UDP, then click Change Scope, select Custom List. In the blank box, enter IP address which allowed acces, then click OK… OK…and OK,.. finish. :)
For the other device, you can search it by yourself, I think you know what will you do. And thelast, how do we know if the SNMP agent has been enabled /installed, running normally?.
Run snmpwalk, from server which has installed SNMP Manager. For example, in Windows has installed Cacti, by default in c:\net-snmp\bin
C:\net-snmp\bin>snmpwalk -c public -v1 localhost
C:\net-snmp\bin>snmpwalk -c public -v1 10.10.10.2
Normally, the result will come out in the form of information or data SNMP, that only SNMP who can understand this data. Then NMS (Cacti) will be transform it to be graph. If all is OK, the graph in Cacti should be shown.


0 comments:
Post a Comment